Serving La Pêche (Wakefield), Ottawa, PEC, Montreal + The Kawarthas
Most wedding photographers work using almost exclusively natural light, and I’m no exception. Aside for the reception, you probably won’t see me with a flash on my camera at all. Because of this, lighting is one of the most important things to consider when choosing locations for photos on your wedding day.
Of course, you can’t control everything. It may be dark and rainy on your wedding day, or it may be bright and sunny. While some aspects have to be left up to fate, there are a lot of things you can do to make sure the lighting will be the best it can be.
A wedding photographer’s camera can only do so much. If amazing wedding photos are a top priority for you, take some time to read through this article to learn what you can do to help your photographer get the very best photos on your wedding day.
Getting Ready
The hours leading up to your ceremony are a really special time—the beginning of the narrative of your wedding day. Putting a little extra thought into where you choose to get ready can really improve how these photos turn out.
Good light is absolutely crucial. A large, clutter-free room with a neutral wall colour and lots of windows is always ideal. Keep in mind how many people will be with you while you get ready—a small room crammed with people will be really challenging to photograph.
Photographic coverage usually starts when the makeup application does. People don’t tend to love having their photos taken with no makeup and half-finished hair!
Ask your makeup artist to set up next to a window with lots of natural light. Avoid sitting in direct sunlight and definitely avoid artificial lighting. Overhead lights and lamps create a harsh, yellow glow which is very unflattering—I’ll ask to turn these off when I arrive.
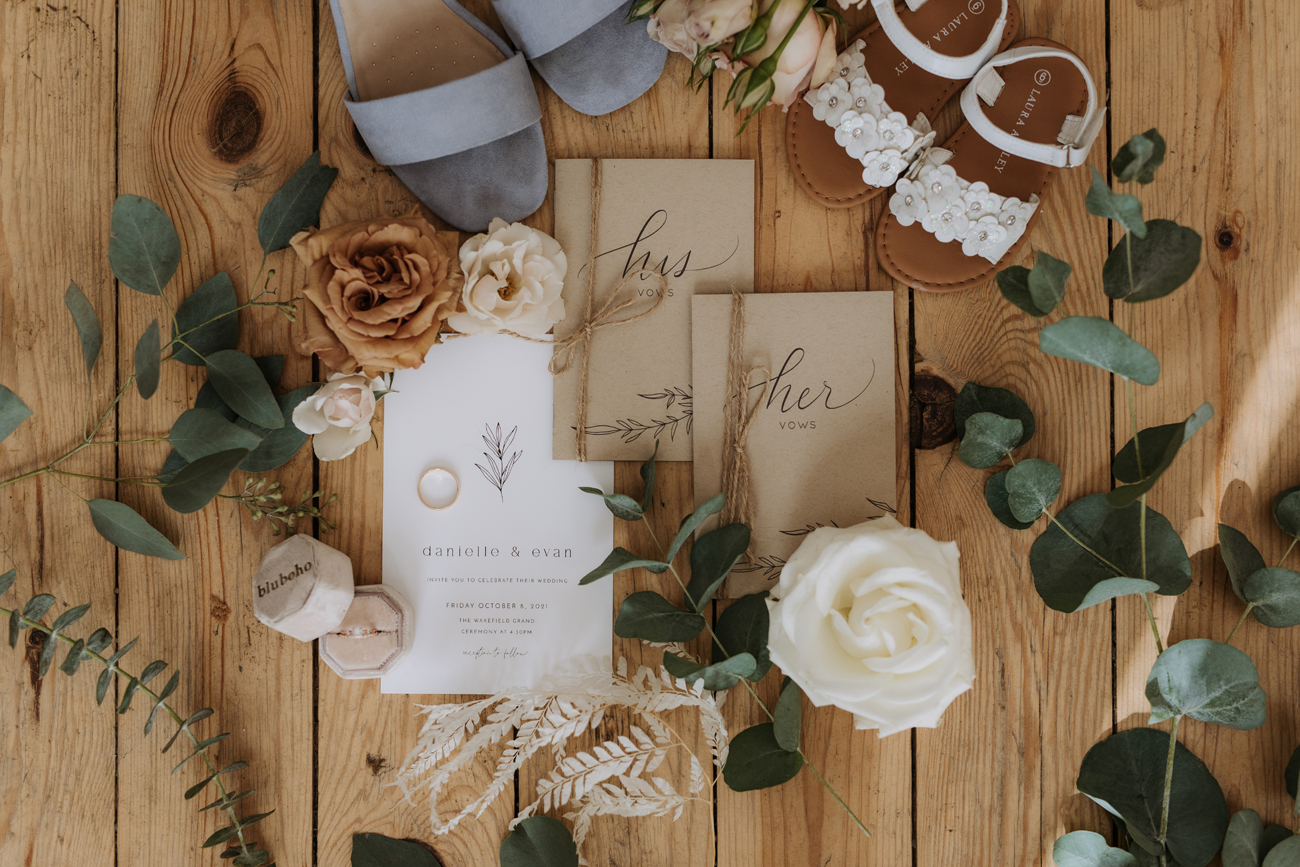
Make sure to have your detail items gathered ahead of time to assure that nothing is missed. Some items you may wish to have photographed include:
- Rings
- Shoes
- Jewelry
- Flowers (loose flowers/leaves are helpful too!)
- Veil
- Invitations
- Dress
- Tie/bowtie
- Watch
- Cuff links
- Perfume/cologne
- Special ring boxes, gemstones, lipstick, mirrors, scarves, etc.. get creative!
- Scarves, silks, etc..
Don’t limit yourself to this list, though! If you have any items that are meaningful to your relationship (such as love letters, keepsakes/tokens, souvenirs, etc..) those make wonderful additions to your detail photos. You can also think outside the box! Include your favourite beer/wine, some fruit, dried flowers or herbs from your garden, your dog’s collar…anything you can think of!
Check out my detail photo inspiration board on Pinterest to help get your creative juices flowing!
Just as importantly, make sure that there’s a nice location to take photos of these items. A wooden table by a window, a deck/lawn/outdoor table (in the shade) or even a well lit bit of hardwood flooring make a beautiful backdrop for photos of your detail items.
Lastly (and this is a big one!), put dress on a wooden hanger. You have your dream dress, let’s make it look the best it can be in your photos. A wooden hanger is a small purchase that will make a huge difference in your photographs!
I’d recommend allocating 1.5-2 hours (total) for getting ready photos.

Your First Look
Many couples decide to have a first look, which is a staged, intimate moment where you see each other for the first time before the ceremony.
If you decide that a first look is right for you, try to find a location away from family and friends, in the shade, to have it take place. You’ll want privacy to make this moment special for you—it can offer a really beautiful set of photos.
First looks aren’t for everyone, but a huge advantage of doing a first look is that you can get a chunk of photos done prior to the ceremony. Getting some photos done ahead of time means you don’t have to leave your guests hanging during cocktail hour and lets you enjoy your party to it’s fullest! Many couples choose to get family/wedding party photos out of the way between the first look and the ceremony.
This is often a great opportunity to grab a few couple portraits as well, but since it’s usually early in the day (when the light isn’t as great as it could be) I recommend taking the bulk of the couple portraits later in the evening, around sunset.
I’d recommend allocating 20 minutes for a first look. You should add an extra 30 minutes to 1 hour if you would like to do group photos during this time as well.

The Ceremony
Are you planning on having your ceremony at an outdoor venue, in your backyard, your cottage or at a park? That is FABULOUS! I adore outdoor ceremonies. You do, however, need to be cognizant of the lighting if you want to make sure that you really nail the photos of your first moments as a married couple.
I highly recommend having your ceremony later in the day (most couples choose to do their ceremony between 4-6pm these days). If your ceremony is going to be earlier in the day, when the sun could potentially be brightly shining down overhead, consider standing in full shade (avoiding dappled light). Keep in mind that, if you’re doing a ceremony in full sun, you will definitely both be squinting in all of your photos.
Avoid mixed lighting at all costs! You should either be in complete shade or complete sunlight. This is probably the most important thing you can take away from this article!
If you’re having an indoor ceremony there’s less control over the lighting conditions. If possible, try to set up close to a window, or consider using candles or strings of light.
If you’re having your ceremony after dark, extra care should be given to make sure that there’s enough available light. Some couples would prefer a more grainy and moody image, while some would prefer the cleaner look that a flash provides. If you want to maintain the ambiance of your evening ceremony this is something you definitely need to discuss with your photographer ahead of time.
You’ll want to put a little thought into what you’re going to do for your first kiss as well. Try not to tilt your heads too much, and consider where you hands will be (shoulders, neck, waist). Hold your kiss for a couple of seconds to make sure your photographer has ample opportunity to get some nice shots, even consider kissing twice.
Another thing to keep in mind is symmetry! Try to stand in the middle of aisle, with your bridal party equal distance away from you on both sides. Putting place markers on the ground is a great way to assure everyone’s standing where they should be.
If your officiant gives you the option, I recommend doing your first kiss before signing the marriage documents (and again, after, if you want!). I find that when couples leave and come back, they rarely end up in the middle of the aisle, which isn’t ideal for the perfect photo of your first kiss!
The wedding recessional (when you walk down the aisle after the ceremony is over) is a fantastic opportunity for images. Make sure you look at each other, hold hands, and don’t go too quickly. Consider stopping half way down the aisle for another kiss! Asking your guests to throw confetti, flower petals, blow bubbles, etc.. adds an extra special element to this exciting moment.
This last point may seem like a no-brainer, but remember stand close to each other, and look at each other during your ceremony! Don’t look at the officiant, don’t look at the ground…look at the person you’re about to marry!

Formal Family Photos
The number of formal group portraits that we take is entirely up to you. These aren’t ever going to be the most exciting images from your wedding day, but it’s a nice opportunity to get photos of your family all together.
I do recommend trying to keep your list of group photos to a minimum as they can eat up a lot of time. I promise that you’d much rather be enjoying your party than standing for an endless list of family photos!
Try to remember that less is sometimes more, and that you probably don’t need every possible combination. It can be helpful to think about what you would actually ever print. Would you print a photo of your full family with JUST you, when you have that exact same photo with your partner in it as well?
The standard list of family photos that I recommend are as follows:
- Both immediate families, together
- Both immediate families, individually
- Both sets of parents, together
- Both sets of parents, individually
- Photos with siblings
- Photos with grandparents
Every family is different, if you’re close with extended family (cousins, aunts/uncles, etc..) you should always feel free to invite them to join in these photos as well!
If your group photos are taking place after the ceremony/during cocktail hour, keep in mind that everyone’s going to be very distracted. It can be a pretty challenging time to wrangle a large number of people for staged photos. I ask that you have a designated organizer who can co-ordinate these groups and keep tabs on which photos have been taken. Impromptu requests from family members can slow things down, so it can be helpful to talk to your family ahead of time and let them know what to expect.
If you’re doing a first look and will be seeing each other before the ceremony, couples sometimes plan to take the formal photos earlier in the day to get them taken care of the party gets underway. That way, you don’t miss out on spending time with your guests later on!
In my experience, it’s best to allow 4-5 minutes per formal group shot that you’re looking to take, so keep that in mind while scheduling your day.

Wedding Party Photos
Many couples are moving away from the traditional wedding party and are, instead, simply choosing inviting their friends to be with them in a more informal way. For others, the traditional wedding party is a super important part of their day and capturing group photos with their gang is a top priority!
For the wedding party, the standard combinations I photograph are as follows:
- Full wedding party with couple
- Couple with bridesmaids/couple with groomsmen
- Bride(s) and bridesmaids/groom(s) and groomsmen
- Individual photos with each member of the bridal party
If taking a few “fun” portraits with your bridal party is something you’re into, make sure to think about this ahead of time. While your photographer will likely have a few ideas, they may not be exactly what you’re envisioning, so this is a good opportunity to speak up and give some direction.
Please take into account weather, as well! While you may love the idea of taking elaborate outdoor photos with your wedding party during your winter wedding, it may be rather unpleasant for them to stand around outside in -20C weather in dresses for more than a few minutes.
I recommend leaving approximately 20-30 minutes for your wedding party photos.

Portraits of the Newlyweds
I always always ALWAYS recommend leaving time around sunset for portraits as a couple. While it can be challenging to pry yourself away from the fun at that time, the lighting will always be best as the sun is going down.
The hour before sunset (the golden hour) and about half an hour after it goes down (the blue hour) are the absolute best time for photos. You’ll want to leave at least 20-30 minutes for portraits, keeping in mind that the more time you leave for this, the more portraits you’ll get.
Some couples will also choose to have a bridal session, which is a photo shoot in your wedding attire that usually occurs a week or two following your wedding day. It’s a fabulous option if you want additional portraiture with a more relaxed timeline and more control over location and weather (not to mention you don’t have to worry about getting your dress dirty!).
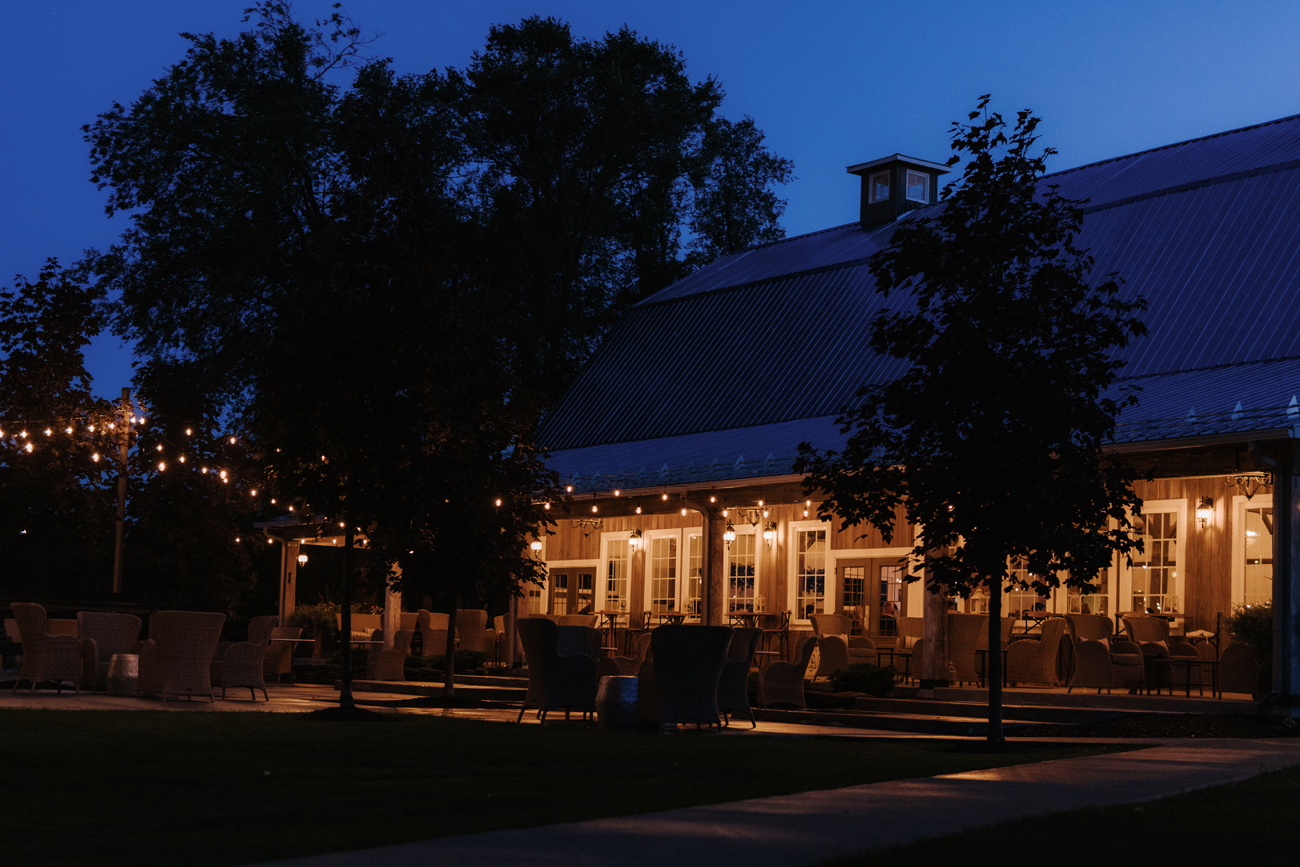
The Reception
Location plays a huge part when it comes to reception lighting. After dark, most photographers will use a flash to help supplement the lighting.
Consider hanging strings of lights, and having extra lighting around the bridal party/the location where the speeches will be happening. It’s best to avoid coloured lights and pot lights.
Most photographers don’t shoot during dinner unless there are speeches that are happening during that time (because who wants to be photographed with a mouth full of food, am I right?). Make sure to feed your photographer at the same time as everyone else—a fed photographer is an energetic photographer!
Some venues serve the photographer later than the guests, but this can be very challenging as when the guests are done eating we’re back to shooting! Please be sure to discuss where your photographer (and other vendors) will be seated, and when they’ll be fed with your day-of coordinator or food vendor. Photographers usually prefer to be sat out of the way so they have a place to leave their gear, and they don’t bother the guests if they’re frequently in and out of their seat.
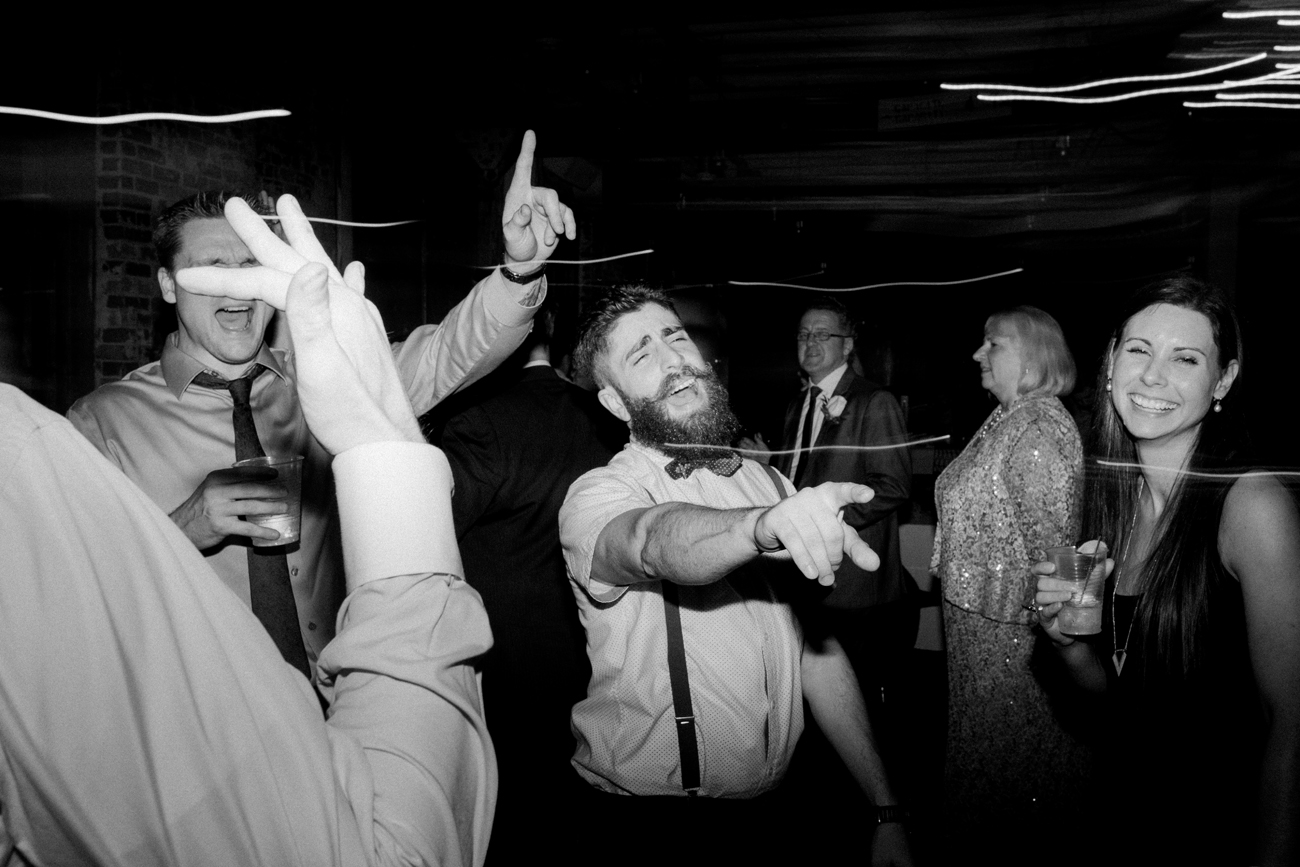
Consider what sort of photos you want your photographer to capture during your reception. Do you want lots of photos of your guests, or would you prefer that they focus more on you? If you’re looking to get some good dancing photos make sure your DJ or band intends on playing a good number of dance songs right off the bat! Leading into dancing directly from your first dance is a great way to get everybody out on the floor.

Last But Not Least…Remember to Relax!
Wedding days never, ever go 100% according to plan, and expecting them to will only cause you grief! Don’t worry if the schedule becomes mixed up, the flowers are late or it’s raining. Embrace the unexpected and keep an open mind, the day is going to be what it’s going to be and worrying about little details won’t do you any good. It’s your wedding day and it will be special and amazing no matter what, so smile, relax and let your friends and family take care of the rest!
And of course…trust your photographer! It’s our job to make sure you get the best photos possible, and we’re here to help however we can.